Calendar Basics
Whenever you use Outlook, you’ll have its calendaring capabilities at your disposal. Even if you don’t have an email account set up, you can still use Outlook for the rest of its features. The calendar works best, however, if you can take advantage of its collaborative capabilities, so using an email account assures you’re able to send meeting invites and receive attendee notifications.
Regardless, here’s your basic, everyday calendar, i.e. the default calendar associated with your default Outlook profile. This is the monthly view, but you can use the functions on the Arrange tab to change the view.

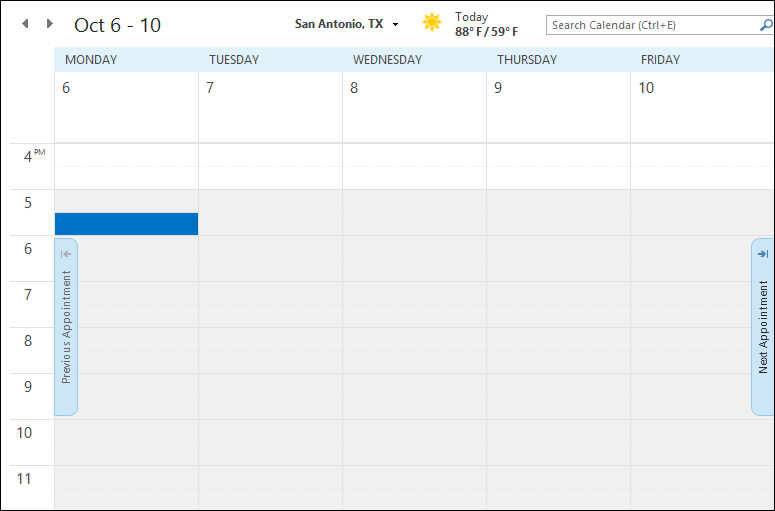
For example, below is the work week view (versus the whole week view). It’s very simple, with the weather (you can set it to your town), and a search box. If you have any meetings or appointments, you’d see them here, and you can skip to the previous or following week by clicking the “Previous Appointment” or “Next Appointment” buttons, respectively, along the calendar edges.
Let’s move on a bit and focus on how to change your calendar’s arrangement to better suit your specific or particular needs.
Flexing Your Calendar’s Muscle
You can do quite a bit to change your calendar’s arrangement and appearance. If you check out the View tab below, you see a whole assortment of styles that you can employ for a calendar that suits your organizational needs.

Check out the following calendar. We’ve made some minor changes to its appearance. For one, you can change the color, which is a subtle but nice touch.

The View tab lets you add several other views to accentuate the mode you’re in. For example, there’s the To-Do Bar, which lets you add calendars, people, and tasks to the right-hand column (see above). This To-Do Bar is customizable to the mode you’re in, so even if you’ve got the tasks and calendar enabled, as in the above screenshot, if you switch to your inbox, you will need to re-enable the To-Do Bar.
It’s a good idea to play around with the View tab in each mode because they’ll not all be exactly the same. For example, the Reading Pane isn’t much use in the calendar view, but it’s definitely a great addition to you inbox.
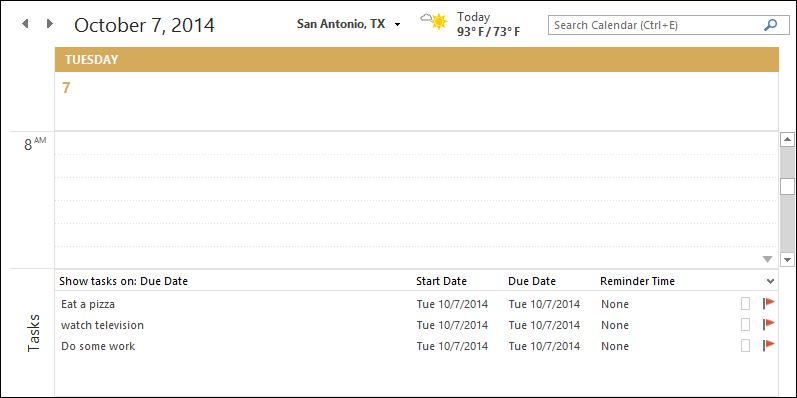
Similarly, check out a daily calendar view with the Daily Task View enabled. You can see here you daily calendar with your due tasks below.
We’ll talk a great deal more about tasks in an upcoming article, but now let’s focus on everything you might want to know about appointments and meetings.
Adding Appointments and Meetings
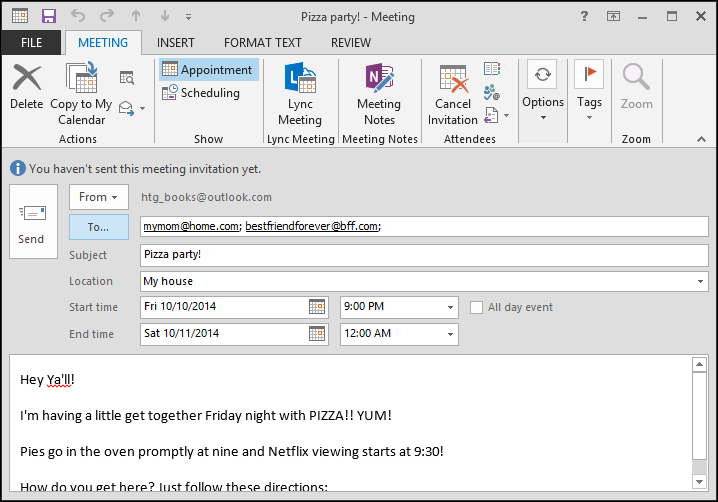
Let’s look at setting up appointments and meetings. In the following example, we’re organizing a pizza party. The subject of course, is the nature of the appointment, and while a pizza party isn’t necessarily an “appointment,” you get the idea. You can then add other specifics such as where the pizza party is taking place, and its start and end times.
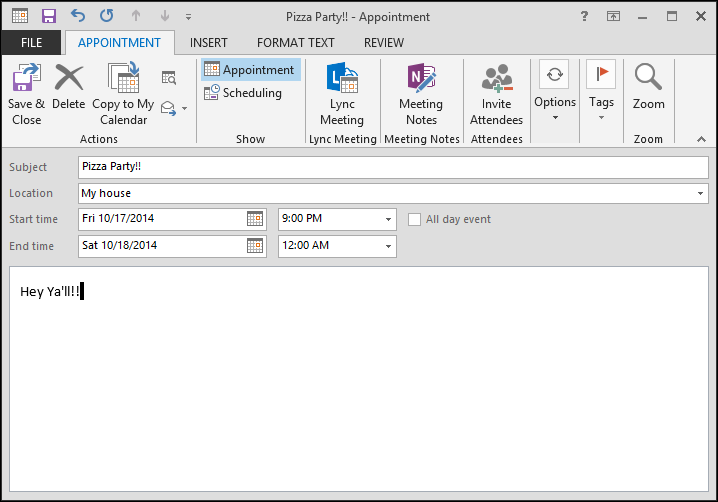
There’s a lot of space (technically unlimited) to add notes, instructions, or directions to the event. Of course, it’s not much of a party if you don’t have other people there. So we’ll need to invite some attendees. Once you invite people, it’s no longer considered an appointment. Instead, Outlook changes it to a meeting. In the following screenshot, we see our new appointment turned meeting.
You can type in names by hand, or click the “To” button to add attendees from your address book. If you haven’t set up an address book yet, we can tell you how to add and manage contacts as well as import contacts from other sources, like Gmail.